This guide will explain how to grow herbs in pots indoors. You will learn how to plant seeds, cuttings, select the right pots, water, and more. You'll soon be able to grow your own delicious herbs after reading this article. In no time you will have a beautiful indoor garden filled with healthy herbs.
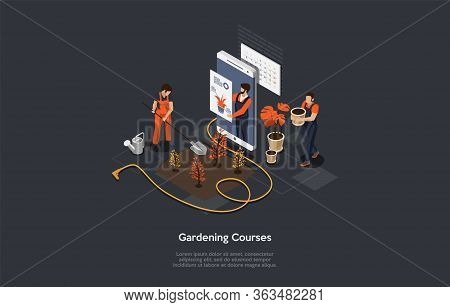
Growing directions for herbs in an indoor herb garden
Growing your indoor herb garden requires several steps. The first step is to make sure the potting mixture is completely soaked. It is important not to let the potting mix get too soggy. Your herb starter will be less stressed if you water it. To maximize its freshness, follow the instructions on how to water your herb plants.
Herbs need full sunlight. They thrive in direct sunlight. Herbs like the light and thrive when they get six hours of direct sunlight every day. Plants that receive little light don't thrive in the center or near windows with northern exposure. Potted indoor herbs should be rotated every week. It helps to rotate them in quarter-clockwise directions so they grow evenly.
Remember that herbs require six to eight hours of direct sun each day when you plant them. If you don't have access to a sunny window, consider buying an organic plant food or liquid fish emulsion. The summer months are a good time to rotate your pots so that they are exposed to light from both the sides. Herbs can also be stunted by harvesting the foliage too early. It is best to wait until they reach about six inches high before cutting the foliage.
It is crucial to water your herbs, but it can be difficult. To test if the soil has dried or is moist, you can stick your finger inside the pot and push it into soil. Water it daily if the soil feels wet. Always drain the soil in the sink after you have watered it. This will keep fungus, disease and other pests from entering your indoor herb garden.
Starting from seeds or cuttings
You must keep the soil moist. The surface should be warm and not dry to start an indoor herb garden. Because their roots are drawn to the moisture below, seedslings will grow through dry soil. If more than one plant sprouts, you should thin them. Thin the seedlings until you have the strongest one. Once they've sprouted two sets of true leaves, transplant them to larger containers or into the ground.
A soil that is free of contamination is the best for cuttings. This soil mixture provides all the nutrients your plants need to thrive. It is best to use sterile soilless mixes for cuttings. A propagation tray may be required to keep the cuttings in place. These are available at garden supply stores. You should only use sterile, soilless material for propagation. Before you plant the cuttings into the soil, make sure to dry them thoroughly.
It is easy to plant indoor herbs with soil. Potting soil can be bought from a local garden center or mixed with dirt that you have on the ground. You should not use plain dirt when planting. It is also not recommended to place the soil in pots. This can cause serious damage to your plant. A fine soil is the best soil to plant indoor herbs.
Herb seeds should be purchased from a trusted source. It is advisable to purchase quality seeds and start the plants from them as soon as possible after they've been purchased. The best and easiest way to start an indoor herb gardening is to purchase seedlings from reliable retailers. Aside from being cheaper and easier to maintain, it doesn't require much maintenance and requires less time than starting from seeds.
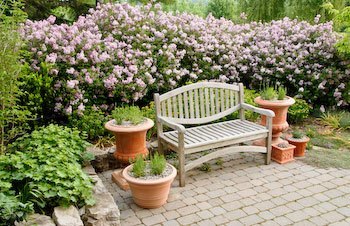
The right pots

Pots for indoor herb gardens come in many styles. For a traditional, elegant look, choose neutral pots. The neutral colors blend well with your garden and make your herbs the focal point. Try to limit your choice of colors and stick with two complementary ones. Bright pots will add a playful element to a modern or eclectic garden. It is crucial to select the right container for your herb garden.
Choose containers with good drainage. Although most pots are equipped with drainage holes for your convenience, you can also add your own drainage holes to a wooden container. Smart Pots, which are fabric planters in various sizes that can hold either a single herb plant or an entire herb garden in one container, are another option. A planter with drainage holes will give you the best results. These herb containers are available with drainage holes in a range of colors, including neutrals, pastels, and bright colors. They are also made from durable, high-quality materials.
Growing herbs in pots is very important. A large pot will be more appealing than 15 small ones. Pots with similar growing needs can be placed within large planters. To form small groups, medium and small pots may be placed directly in front. To find the perfect pots for your garden, spend time at the center. The size of your container herb garden is also important if you're working with a small space.
Proper lighting can make it possible to grow herbs with success. Herbs need six to eight hours of light per day. Southern windows and those in the southwest receive the most sunshine throughout the day. Although they get a lot of sunlight during the day, east-facing windows are less likely to receive sufficient light. If this isn’t possible, grow lights can be used or a window that has a southern exposure. These lights mimic sunlight, and will ensure your herbs thrive.
Watering
It is important to give indoor plants slow and thorough watering. The amount of humidity in your house will affect how often you water your herb plants. To ensure adequate water, make sure you remove plants with large roots or too small. You should water your herb pots in a cooler window sill. After the soil has dried, you can check them with your finger. They will need to be hydrated more if the soil is too dry.
To prevent excessive watering, a tray can be used to catch the excess water. Each herb pot should be able to hold eight square inches. Good air circulation is key to herbs' success. They need to have adequate air circulation in order to keep their leaves healthy. Pots can look unattractive and make soil moisture difficult to maintain. To prevent this problem, consider using a tray or container that is large enough for the herb pots to grow.
Remember to rotate your grow lamp every week. If your plants do not have adequate sunlight, add supplemental grow lamps. Grow lamps offer additional light for twelve hours each day. You should ensure that the grow lamp is at the least six inches above your herb. Then, adjust the light time to match the plant's needs. If the plants show signs of reduced growth, you can turn off the supplemental light lamp.
Use small pebbles to create a perfect humidity environment. You can place the dish on a tray of gravel, pebbles or stones to create a 50% humidity environment. If the humidity is too low, a humidifier placed near the plants will help. A soil moisture meter is the best way to measure humidity. Next, you will need to water the plants properly.
Pests
You should be aware of several pests that can infest indoor herb gardens. Both spider mites, as well as apids, are very common in indoor herb gardens. However they rarely cause major damage. These insects can be found on the leaves as shiny, dark spots. Spittle insects leave an unsightly frothy film on the foliage that is easy to get rid of with water. The fungal diseases can also cause significant damage to your herbs. Fusarium rootrot can cause brown spots on the stems of your herbs and could even kill them.
Although there is no solution to all aphid problems, there are some essential oils in herbs that can help. Cedar oil, for example, has a pronounced scent reminiscent of juniper that deters aphids, thrips, and fleas. Citronella essential oil can also be used to repel pests.
Aphids: These tiny pests can be found in all indoor herb gardens. They are very small and can often be less than a quarter of inch in length. They feed by sucking out plant sap. Aphids spread many diseases to plants and are essential for maintaining high-quality yields. Aphids are difficult to get rid of because of their complicated life cycle: they feed by laying eggs and giving live young. Aphids can seriously damage your plants and reduce their yield.
Aphids, the most common pest in indoor herb garden gardens, are the Aphids. These critters are identifiable by their distinctive white appearance. If they cause leaves to turn yellow or brown, they can also cause them to die. Aphids are found on the leaves' underside. Whiteflies, small, waxy insects that only a magnifying lens can detect, live on the leaf's surface. Neem oil is a plant oil made from the neem tree that kills insects and prevents them from laying eggs. Ladybugs can be purchased as live insects.
FAQ
What is the first thing to do when starting a garden?
The first thing you should do when starting a new garden is prepare the soil. This includes adding organic matter like composted cow manure, grass clippings leaves, straw, and so on, which will help to provide plant nutrients. Next, place seeds or seedlings in prepared holes. Then, water well.
How often should I water my indoor plant?
Indoor plants need watering once every two days. It is important to maintain the humidity level in your home. Humidity is crucial for healthy plants.
Can I grow fruit trees in pots?
Yes! Yes! To prevent tree rot, make sure the pot has drainage holes. The pot should be deep enough to hold the rootball. This will prevent the tree from being stressed.
Do I have to purchase special equipment in order to grow vegetables on my own?
No, not really. All you need to do is use a shovel, trowels, watering containers, and maybe even a rake.
What is a planting calendar?
A planting schedule is a list listing the dates when plants should be planted. The goal is for plants to grow at their best while minimizing stress. Early spring crops like spinach, lettuce, and peas must be sow after the last frost date. Cucumbers, squash, and spring beans are later crops. Fall crops include cabbage, potatoes, cauliflower, broccoli and cauliflower.
Statistics
- Most tomatoes and peppers will take 6-8 weeks to reach transplant size so plan according to your climate! - ufseeds.com
- As the price of fruit and vegetables is expected to rise by 8% after Brexit, the idea of growing your own is now better than ever. (countryliving.com)
- Today, 80 percent of all corn grown in North America is from GMO seed that is planted and sprayed with Roundup. - parkseed.com
- According to a survey from the National Gardening Association, upward of 18 million novice gardeners have picked up a shovel since 2020. (wsj.com)
External Links
How To
How to apply Foliar Fertilizers
Foliar fertilizers are applied to plants directly by spraying. Foliar fertilizers provide nutrients to the plants, as well as promoting growth and protection from adverse weather conditions. They can be used for treating any plant, fruits, vegetables or flowers.
Foliar fertilizers do not pose a risk for soil pollution. The type of plant, the size of the plant and how many leaves it has will determine how much fertilizer is needed. Foliar fertilizers are best used while the plant is still actively growing. This allows them more time to absorb nutrients. These are the steps to follow when fertilizing your garden.
-
Be sure to determine the right type of fertilizer for you. Some products only have one nutrient while others contain multiple elements. If you're not sure which product is right for you, you can ask your local nursery.
-
Please read the instructions carefully. Before you spray, make sure to read the label. Spraying near windows or doors could cause damage. Keep pets and children away
-
Use a hose attachment if available. To avoid overspray, turn off the nozzle after every few sprays.
-
Mixing different types of foliar fertilisers can cause problems. Mixing different types can result in harmful effects like burning or staining leaves.
-
Spray at least five ft from the trunk. It is important to leave at least three foot between the tree trunks, and the edge of any area you intend to apply the fertilizer.
-
Wait until the sun is down before applying. The sun causes light-sensitive fertilizer chemicals to be broken down by sunlight.
-
Spread the fertilizer evenly on the leaves. Spread the fertilizer evenly over large areas.
-
Before watering, let the fertilizer dry completely.